GoHighLevel Lead Integration
1. Automation
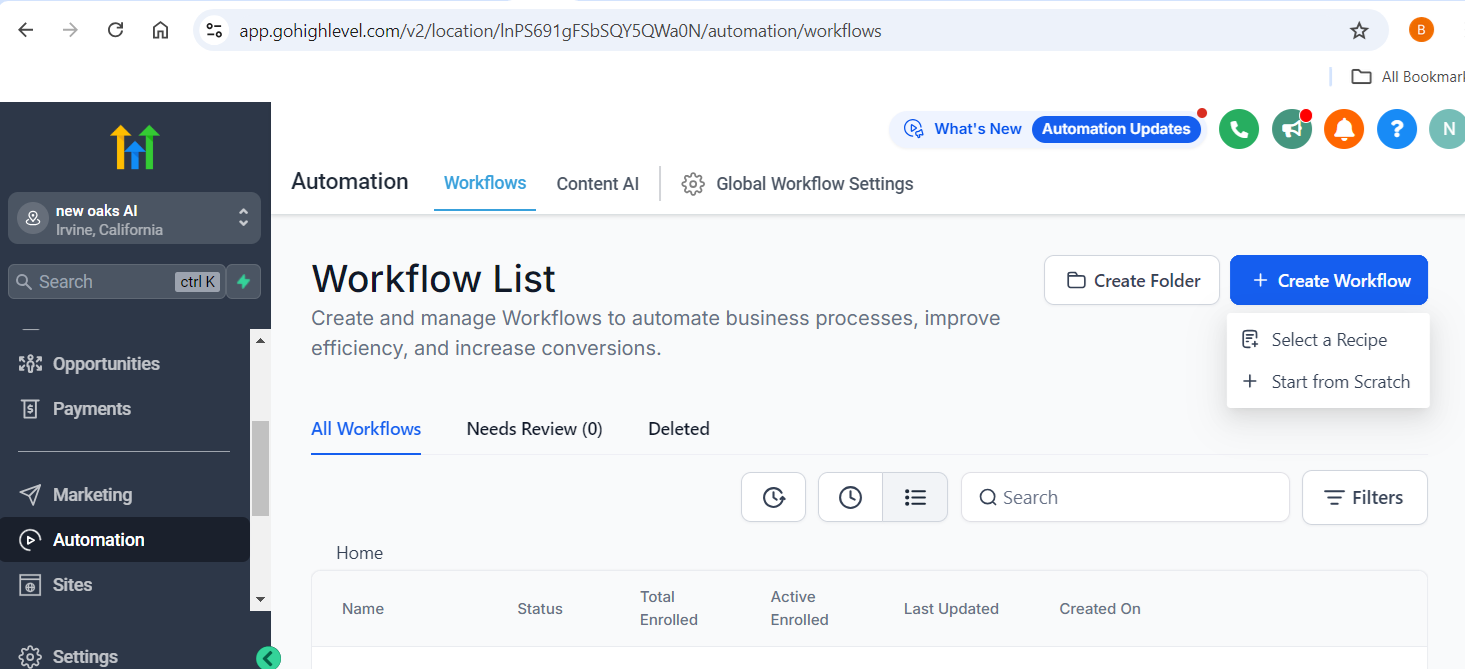
Open GoHighLevel website in your browser and login with your account credentials, on the left panel, click “Automation” Tab.
2. Create Workflow
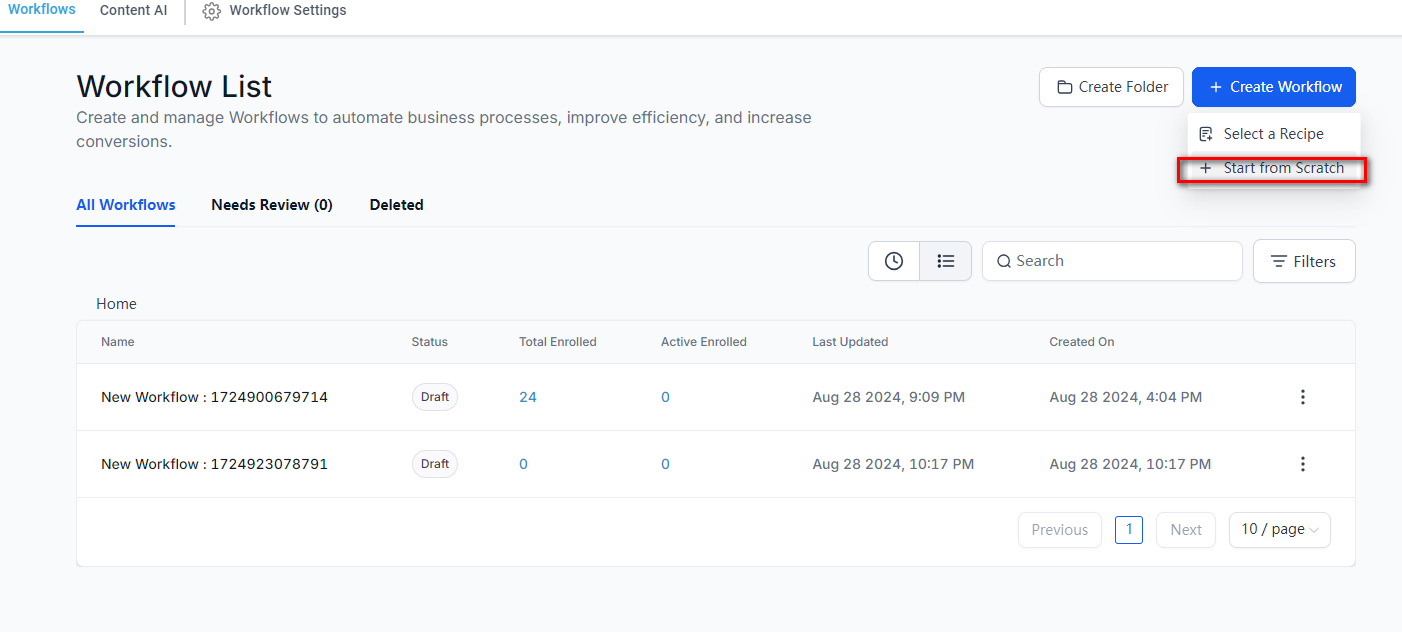
On Workflows page, click “Create Workflow” button, then choose “Start from Scratch” option.
3. Add New Trigger
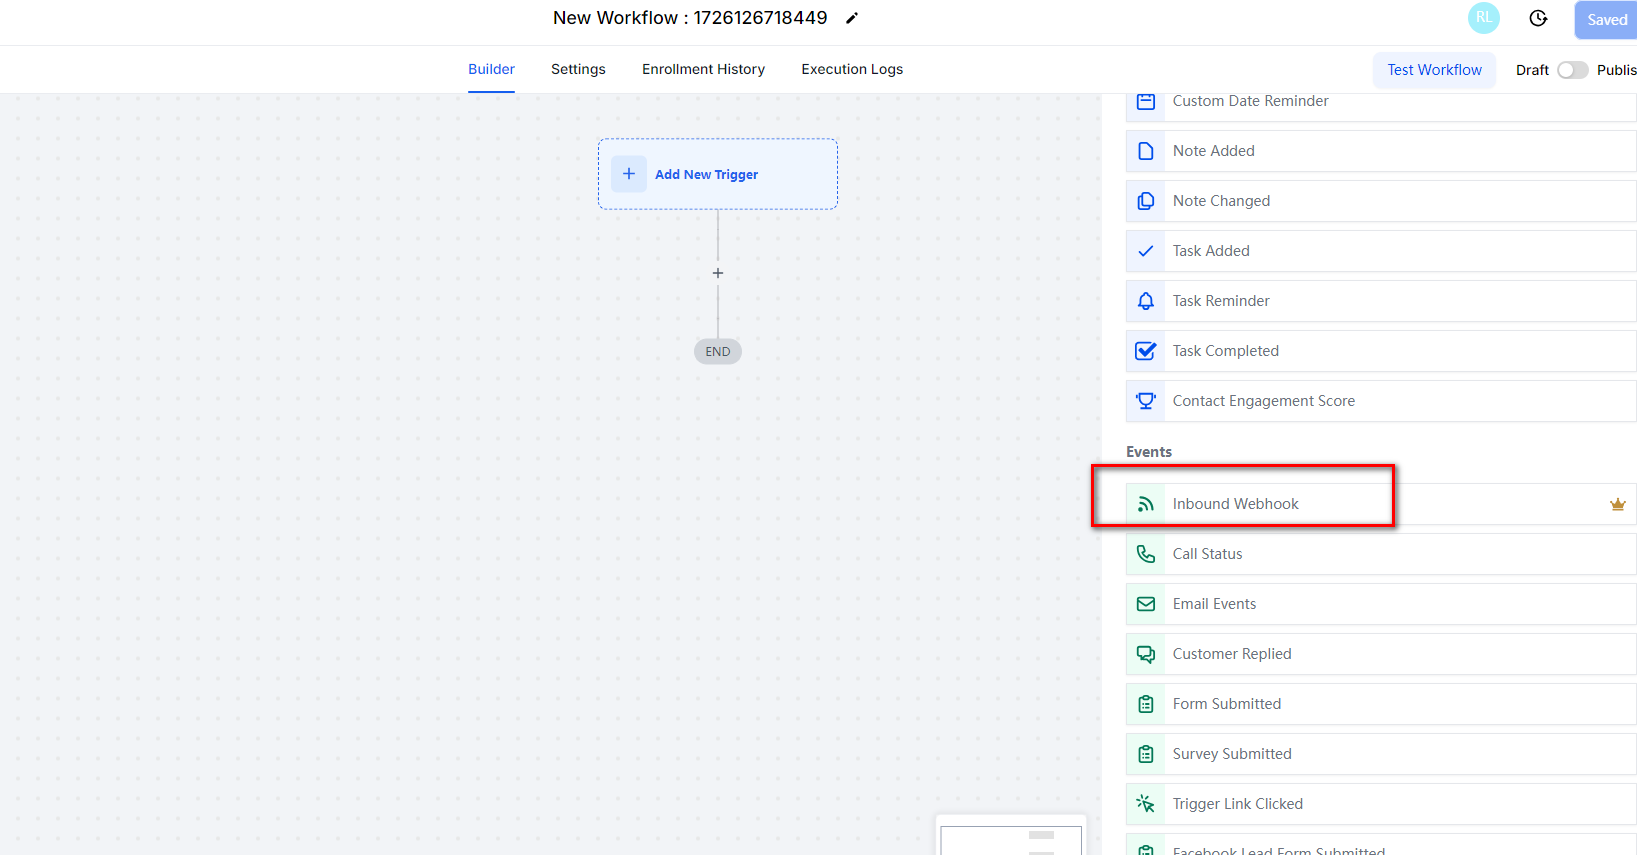
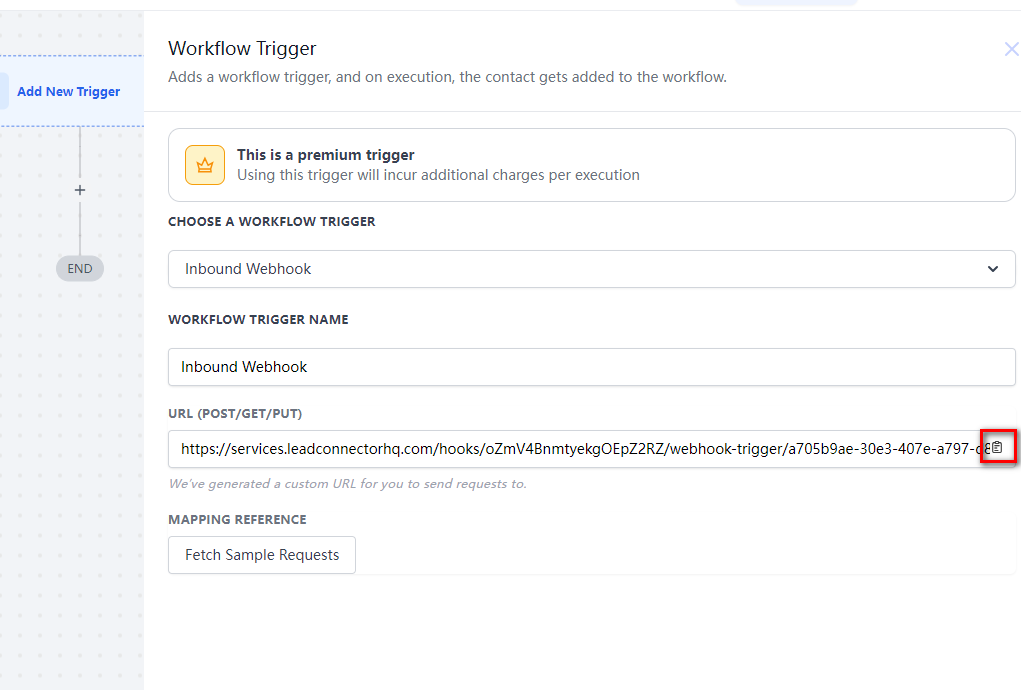
On the new workflow window, click “Add New Trigger”, find “Inbound Webhook” event from Events list
4. Inbound Webhook
Click “Inbound Webhook” and from Url section and copy Url showing as below screenshot
5. Webhooks API
Open digital-assistant.dynamaize.com website in another browser tab, login your account and select “Workspace” section, On Workspace Management panel, click “Webhooks API” button
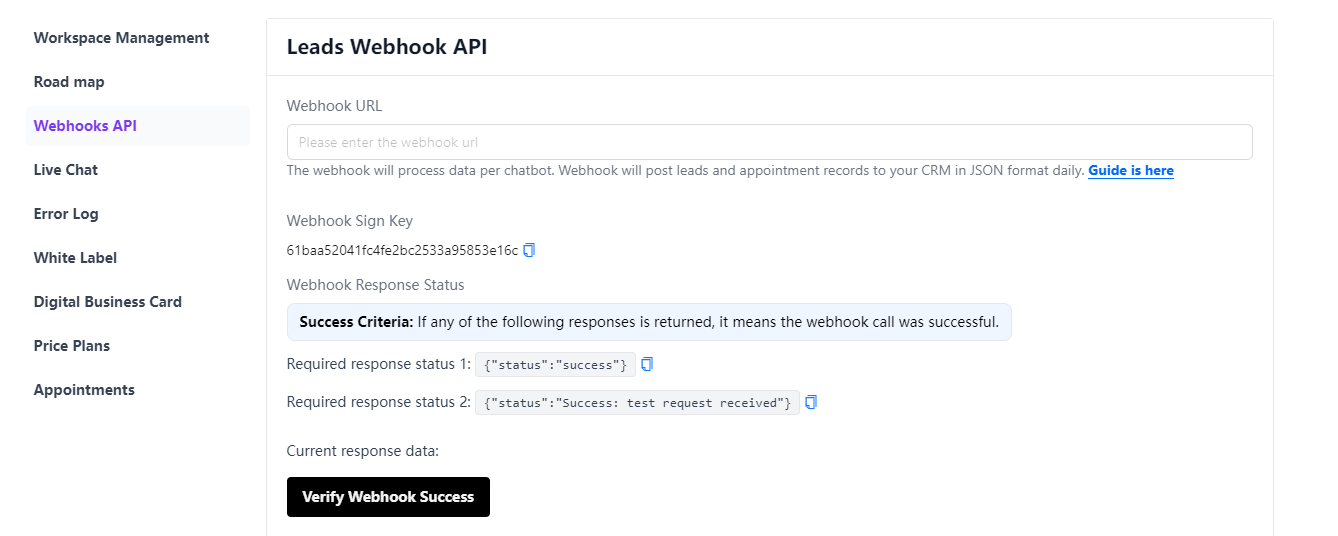
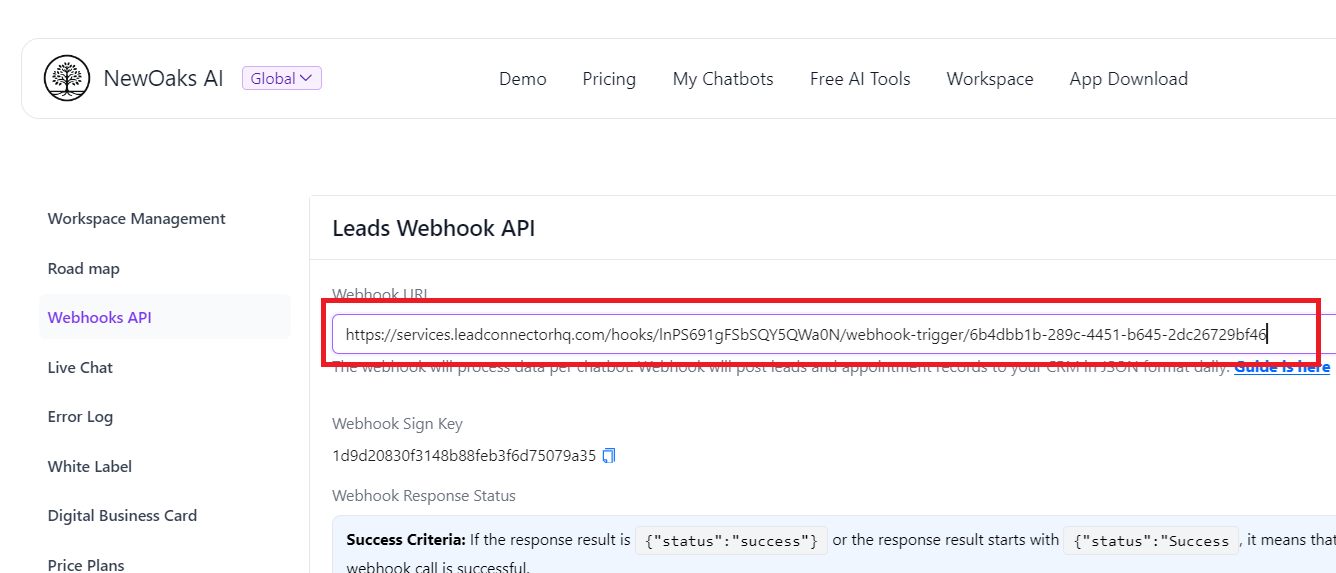
- Paste Url that copied from GoHighLevel to
digital-assistant.dynamaize.com“Webhook URL” textbox
6. Verify Webhook
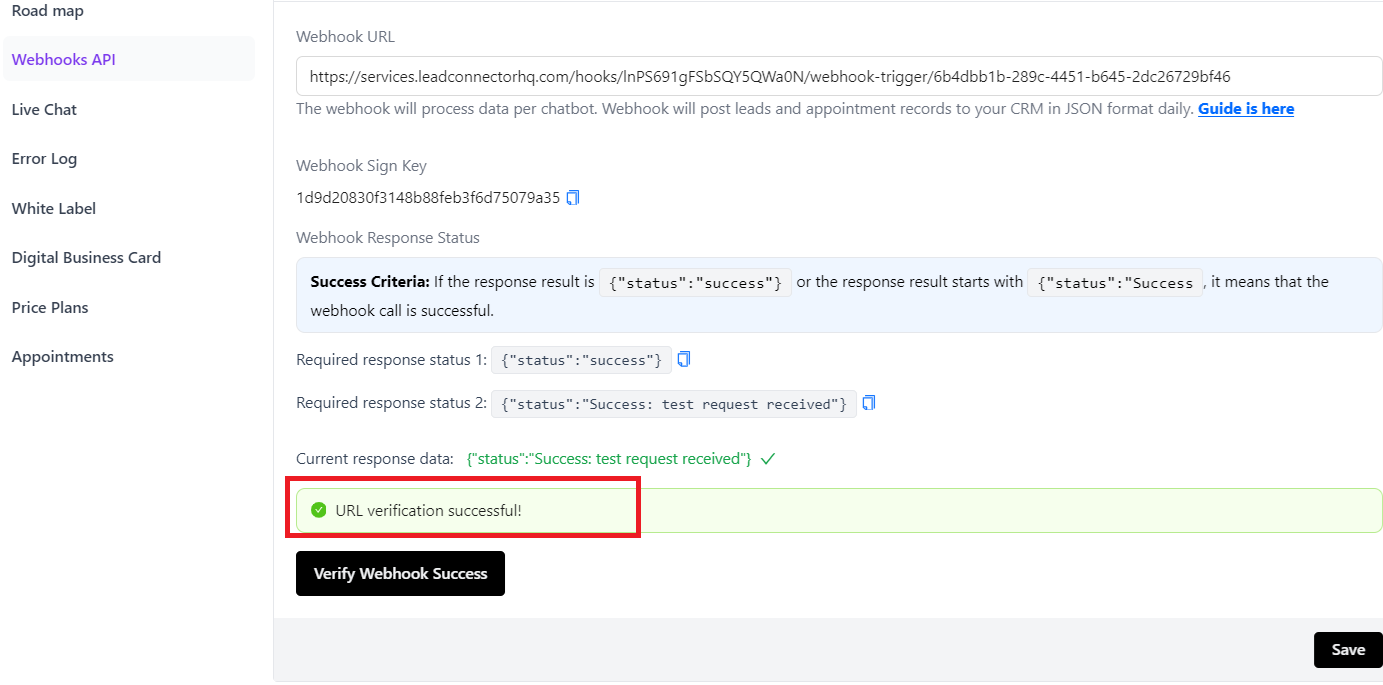
click “Verify Webhook Success” button, it will display “URL verification successful!” text, then click “Save” button
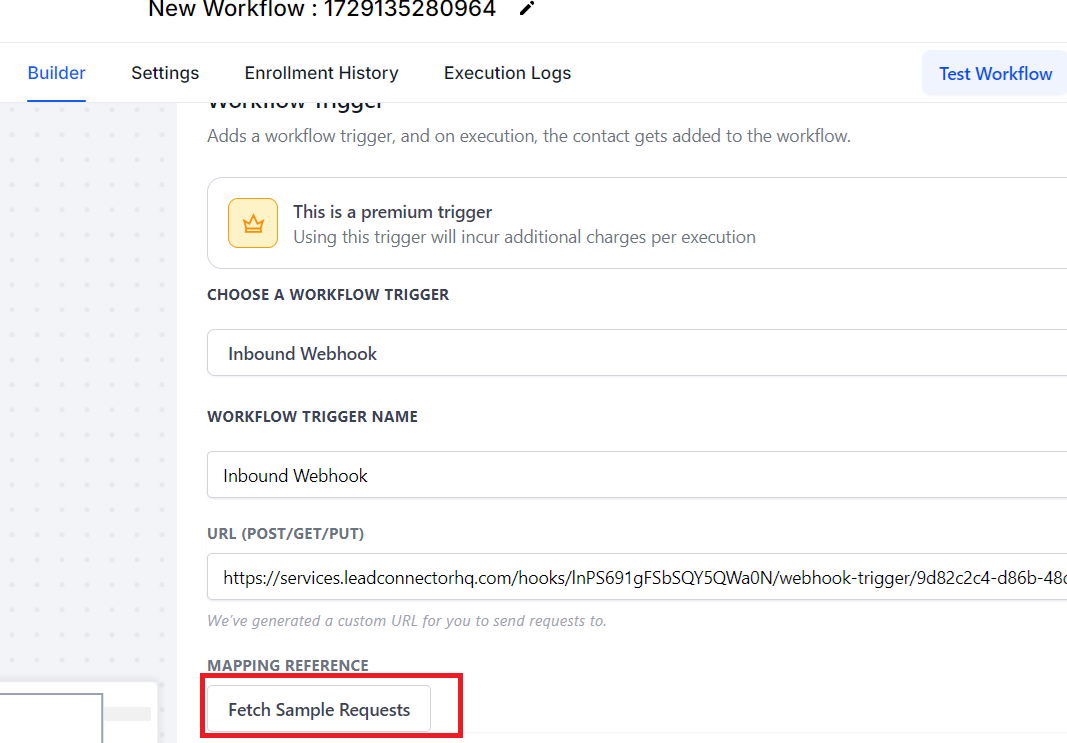
7. Fetch Sample Requests
Go back to GoHighLevel website, click “Fetch Sample Requests” button to get digital-assistant.dynamaize.com lead information
8. Save Trigger
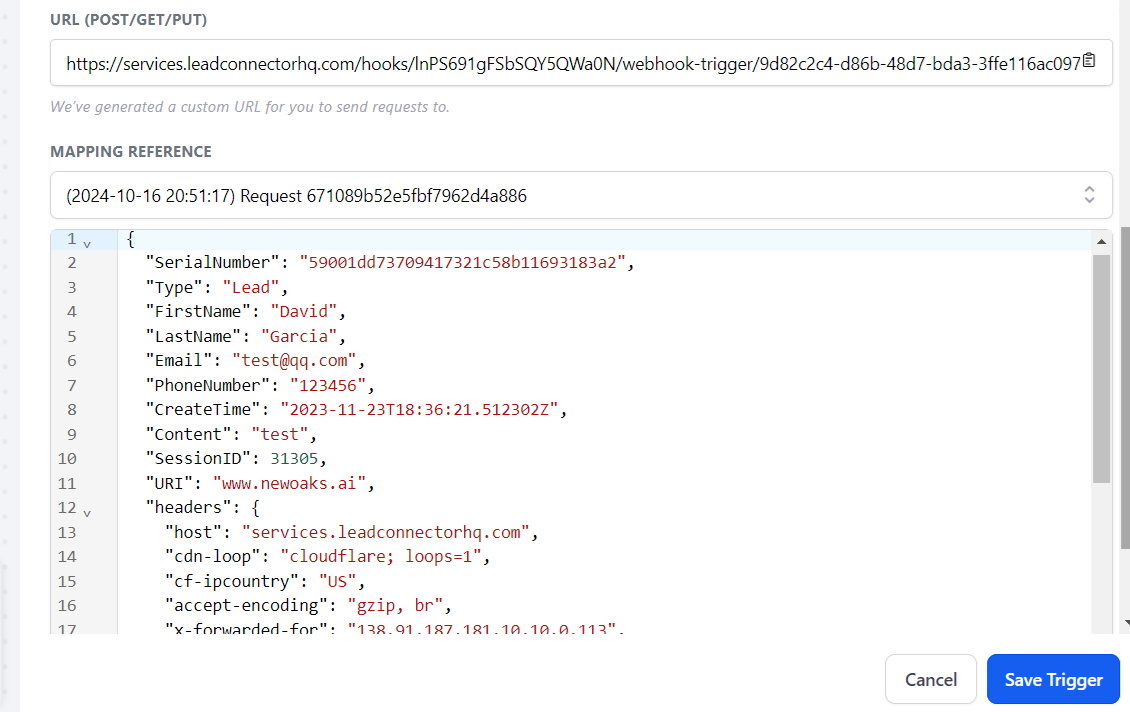
It might take couple of seconds to fetch leads information from digital-assistant.dynamaize.com, choose any lead from Mapping reference, the details of lead will show up in below section, then click "Save Trigger"
9. Create Contact
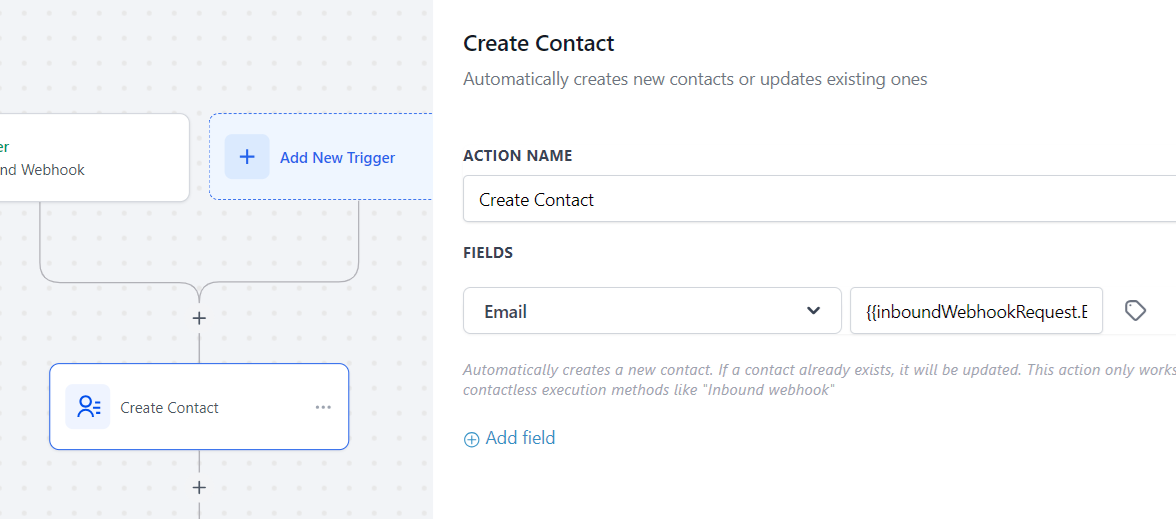
Click "+" on the workflow builder to add an action, choose "Create Contact"
Click "Add field" button, choose Fields "Email", and click the little icon, in the popupwindow, choose {{inboundWebhookRequest.Email}}
10. Send Email
- Click “+” on the workflow builder panel to add an action, Find “Send Email” action and click “Send Email”
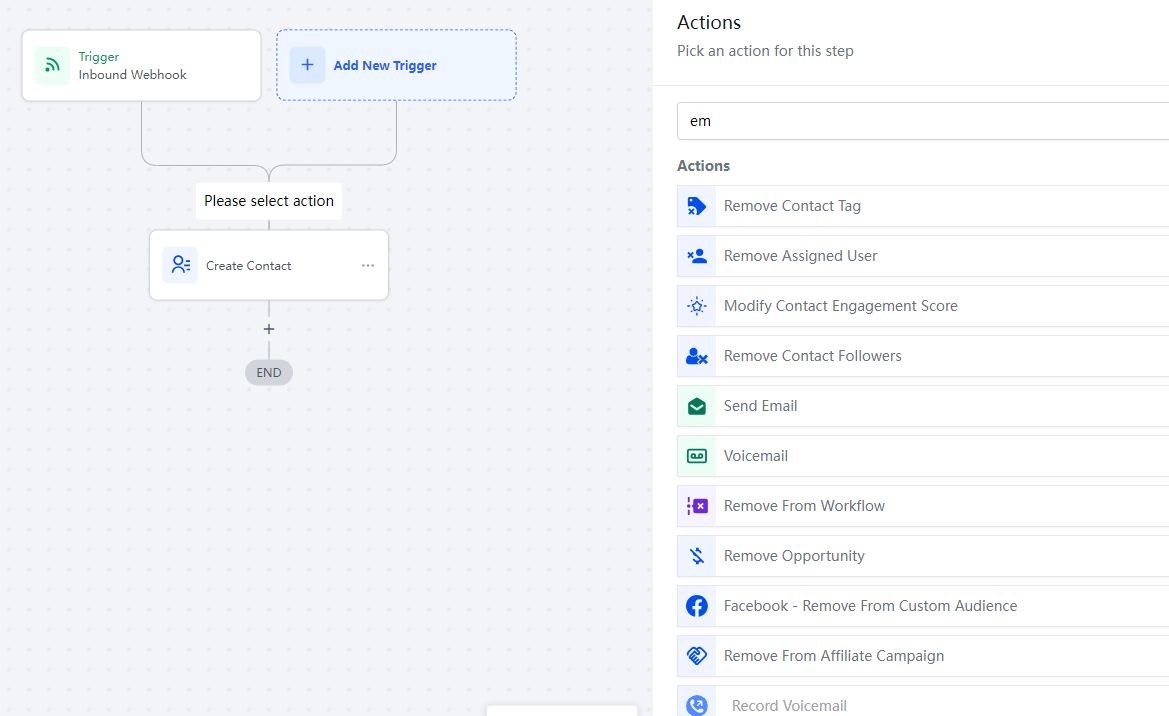
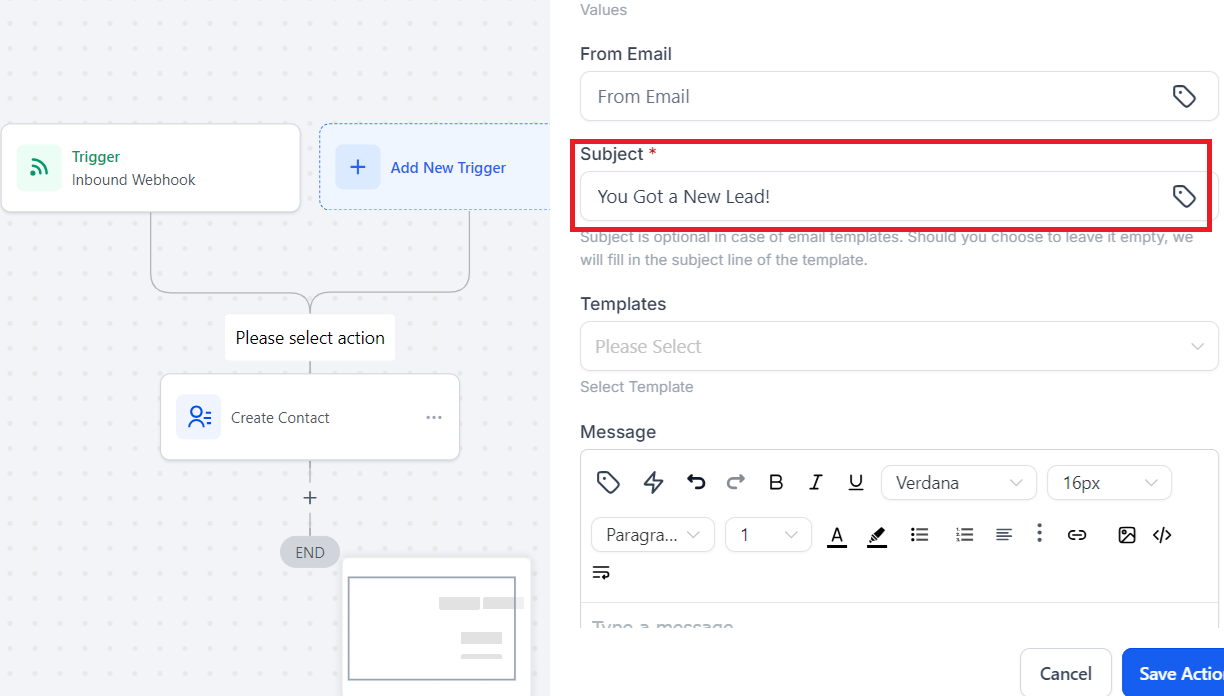
- In the Send Email window, Put any text on “Subject” textbox
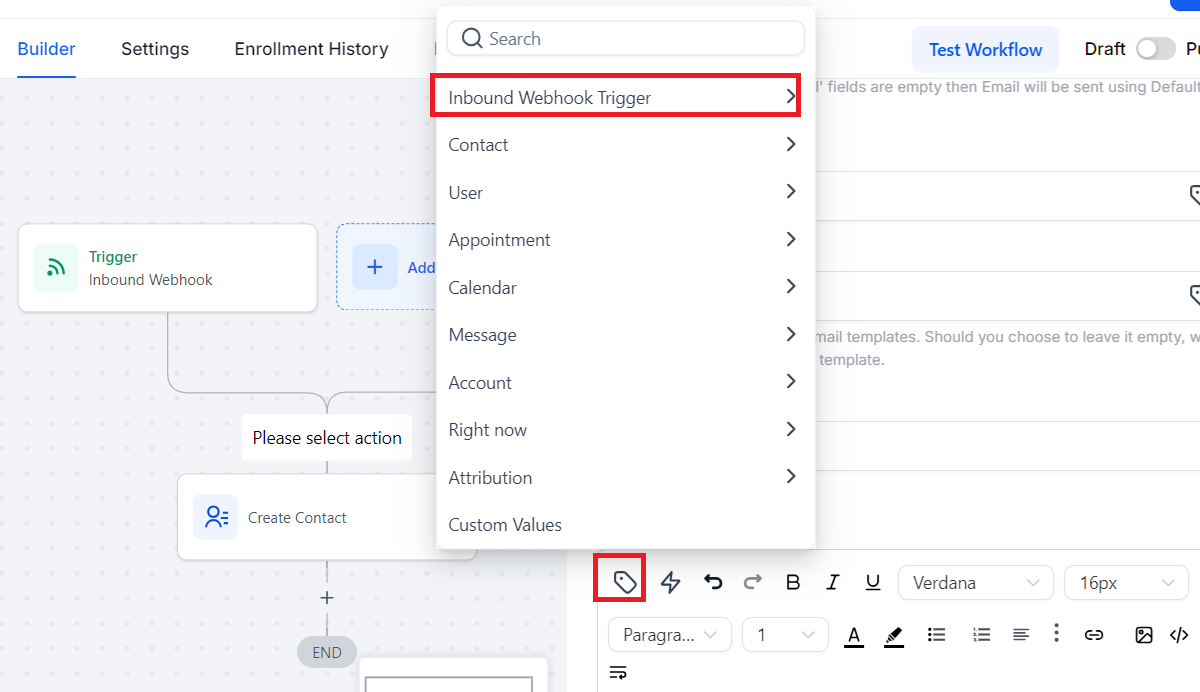
- In “Message” section, click “Custom Values” Button showing below, a window is popped up, choose “Inbound Webhook Trigger”
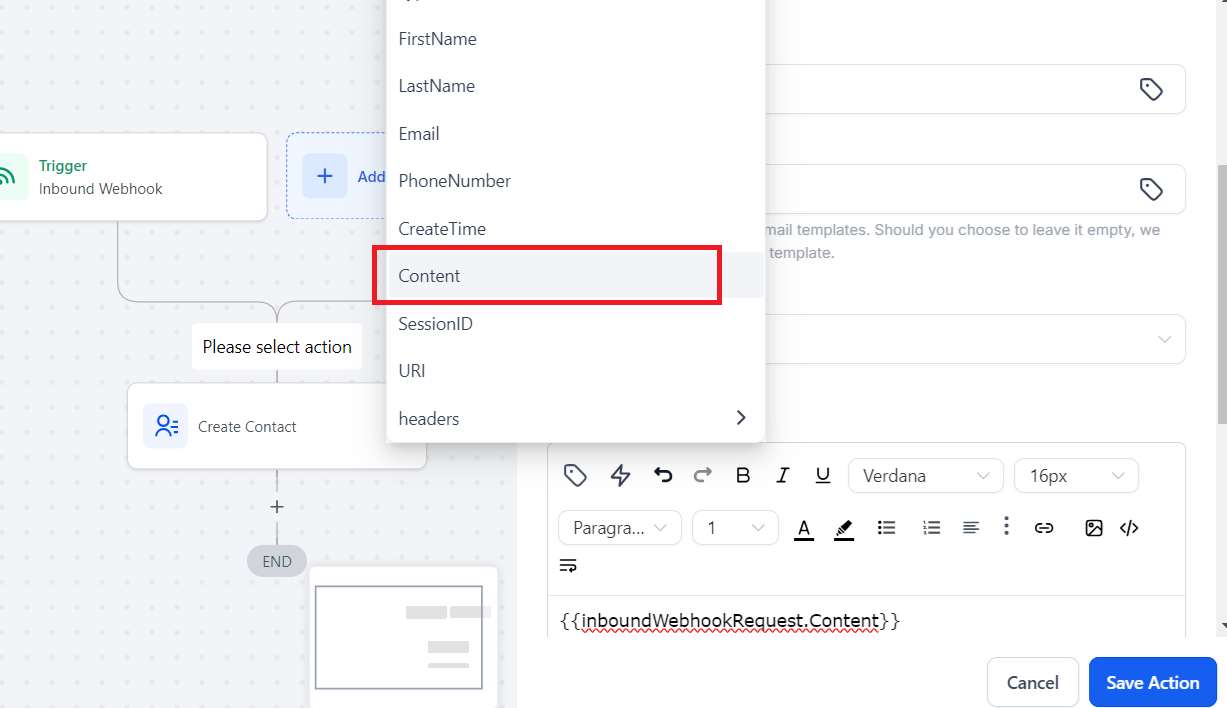
- On the next window, select “Content”
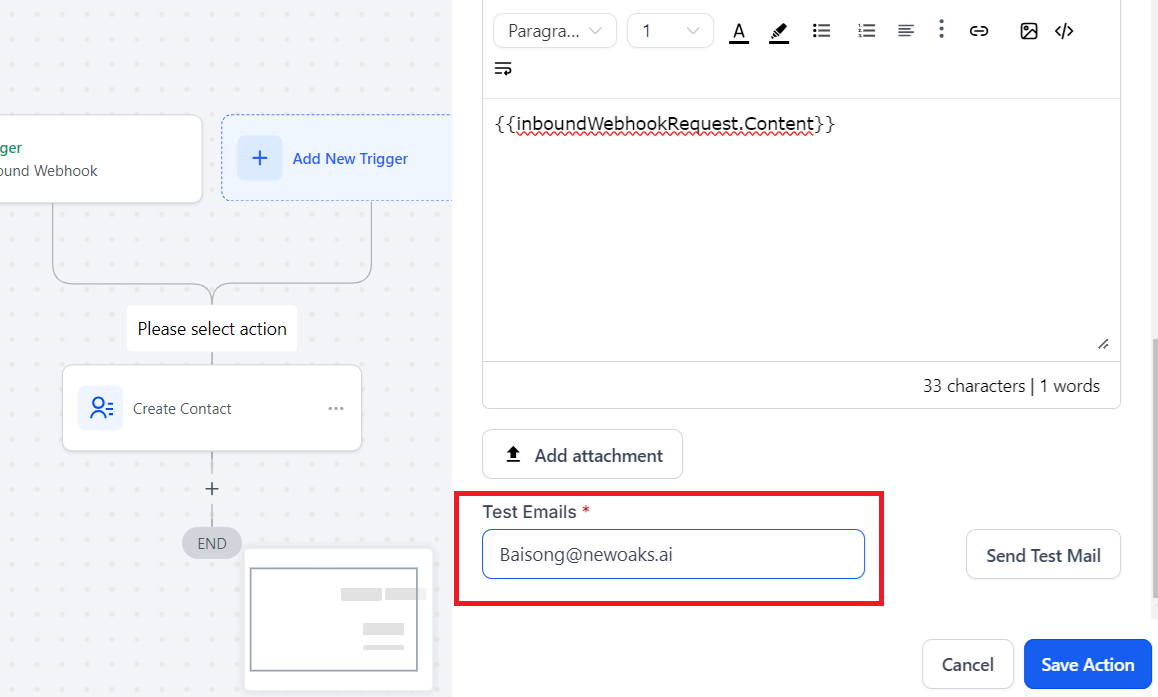
- Add your email as “Test Emails”, click “Send Test Mail”, you should get a test email.
- Click “Save Action”
11. Save
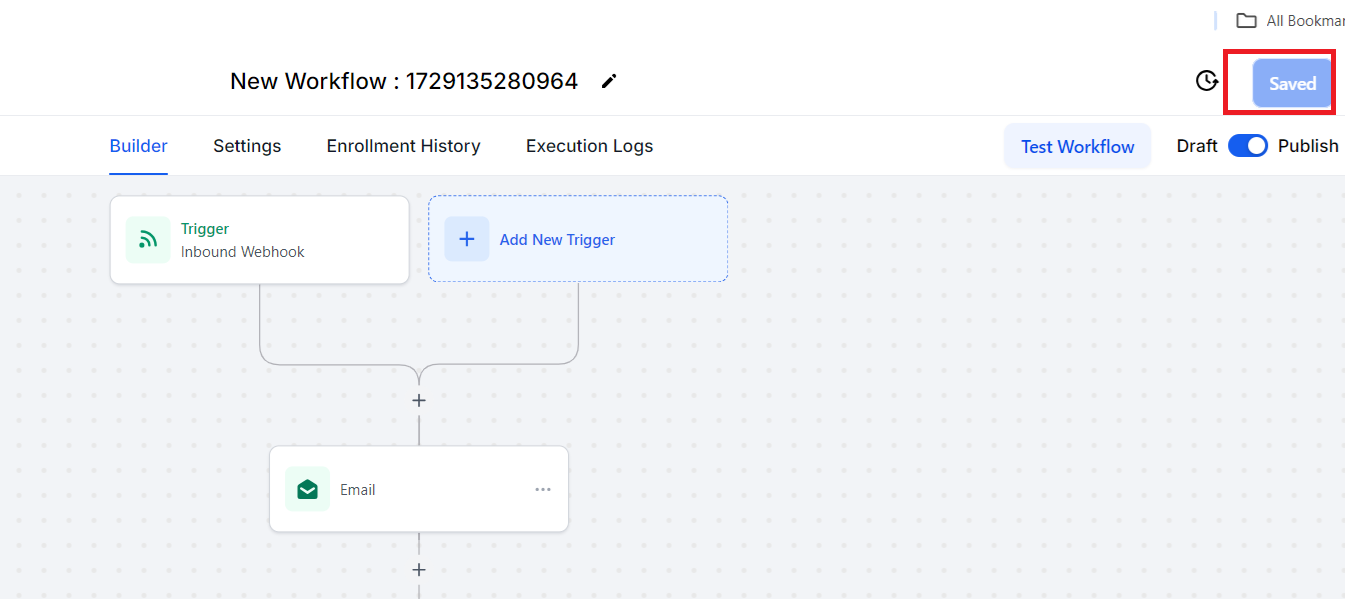
Click “Save” Button on the top right corner to finish the workflow setup